Performing a technical diving valve shutdown drill requires a high level of skill and precision. It is an essential safety procedure that all technical divers should master before undertaking tech dives. In this guide, we will walk you through the steps of performing a technical diving valve shutdown drill.
A technical diving valve shutdown drill is a safety procedure that involves simulating:
Cylinder valve failure
Regulator failure
This drill is typically performed during technical dive training. It involves:
Opening and closing every valve on backmount doubles
Switching between primary and backup regulators
Coordinating the canister light cable
Communicating with team members
The goal of this drill is to prepare divers for potential equipment failures or emergencies.
In essense, it teaches them how to quickly and effectively isolate a malfunctioning tank valve to prevent gas loss. It is typically performed in a controlled environment under the supervision of a certified technical diving instructor.
Sponsored Link
Three reasons to practice the technical diving valve shutdown drill
Safety First
The most important benefit of practicing the technical diving valve shutdown drill is safety. The valve shutdown drill helps divers quickly and efficiently deal with a malfunctioning regulator and reduce lost gas volume.
By regularly practicing this drill, divers become more confident and competent in handling gas system failures. As a result, this can ultimately save their lives.
Improved Equipment Familiarity
Technical diving equipment is highly specialized and can be complicated to operate. Performing the valve shutdown drill helps divers to become unconsciously familiar with their gear.
In addition, divers understand how to manipulate the equipment correctly. This intuitive familiarity can reduce the likelihood of human error under stress. It allows technical divers to feel more confident and comfortable in the water.
Enhanced Teamwork
Technical diving typically relies on well-coordinated teams, and the valve shutdown drill requires close collaboration between divers.
By practicing this drill regularly, divers can:
Improve their communication skills
Ensure consistent protocols are followed
Develop trust and reliance on their teammates
This teamwork is critical in emergency situations where quick and efficient responses are necessary.
The technical diving valve shutdown drill: Step-by-step
Performing a technical diving valve shutdown drill is a task that demands methodical precision and flawless execution.
The dive team must be primed and ready to provide vigilant support. Importantly, they must not be distracted from observation. They should remain primed to donate gas at a moment’s notice.
It is not unheard of for a diver practicing the valve shutdown drill to make mistakes with the protocol. As a consequence, they might leave themselves without a breathable regulator.
The diver performing the drill must maintain a razor-sharp focus throughout the entire operation. From start to finish, they should retain:
If those attributes become degraded during drill practice, they should be recognized as task overloading.
Step 1: Signal to your team you are going to perform a valve drill
The first step in performing a technical diving valve shutdown drill is to signal to your team. This lets them know that you are going to perform a valve drill.
In turn, this will ensure that everyone is aware of what you are doing and is in the correct position.
Step 2: Wait until your team is observing and then continue
Once your team is in place and free from distractions, you can continue with the valve drill. It is essential to wait until everyone is in the correct position to avoid any confusion. You must ensure that you are supported should a mistake be made.
Step 3: Purge backup regulator
Before starting the technical diving valve shutdown drill, you should purge your backup regulator. This confirms that the valve is open and functioning correctly. Doing this will give you peace of mind and ensure that you have a backup in case of any issues.
Step 4: Shut down the right-hand valve whilst simultaneously signaling you are manipulating a valve to your team
The next step is to shut down the right-hand valve. At the same time, signal to your team that you are manipulating a valve. This will ensure that everyone is aware of what you are doing and is prepared for any potential issues.
Step 5: When the valve is shut down, breathe down the primary regulator until empty
Once the right-hand valve is shut down, you should breathe down the regulator until it stops delivering gas. This promotes a beneficial response in real-world emergencies where you will utilize as much gas as is available.
Step 6: Remove the primary regulator and replace it with your backup regulator
After the regulator has stopped delivering gas, you should remove it and replace it with your backup regulator. When gas is depleted, remember the mantra “slow is smooth, smooth is fast”. Rushing this step can result in fumbling, which ultimately delays restoring a gas source for breathing.
Step 7: Clip off your primary regulator on the right chest D-ring
You should then clip off your primary regulator on the right chest D-ring. This will ensure that it is out of the way and will not be mislocated or damaged during the rest of the drill.
Step 8: Re-open the right-side valve
Once your primary regulator is clipped off, you should re-open the right post. This will allow you to check that the post is functioning correctly and is ready for use.
Step 9: Unclip the primary regulator and purge it
You should then unclip the primary regulator and purge it. This will ensure that it is functioning correctly, delivering gas, and is ready for use.
Step 10: Remove the backup regulator from your mouth and replace it with the primary regulator
After purging the primary regulator, you should remove the backup regulator from your mouth. Replace it with the primary regulator. This will ensure that you have the correct regulator in your mouth for the rest of the drill.
Step 11: Shut down the isolator whilst simultaneously signaling you are manipulating a valve to your team
The next step is to shut down the isolator. Again, simultaneously signal to your team that you are manipulating a valve. This will ensure that everyone is aware of what you are doing and is prepared for any potential issues.
Step 12: When the isolator is closed, re-open it
Once the isolator is shut down, you can immediately re-open it.
Step 13: Move your torch to your right hand
If using a canister torch, you should then move the Goodman handle to your right hand.
This will allow you to check the position of your left post without impediment. It preseves arm mobility and finger dexterity. Additionally, it eliminates the risk of entangling the canister torch cable.
Step 14: Shut down the left side valve whilst simultaneously signaling you are manipulating a valve to your team
The next step is to shut down the left-hand post. Again, simultaneously signaling to your team that you are manipulating a valve. This will ensure that everyone is aware of what you are doing and is prepared for any potential issues.
Step 15: When the valve is closed, purge the backup regulator until the gas supply stops
Once you have closed the left-hand post, purge the backup regulator until gas delivery ceases.
Step 16: Re-open the left side valve and purge to confirm it is working
Next, re-open the left post and purge the backup regulator to confirm that it is working correctly. This step is essential to ensure that you can switch back to the left post if necessary.
Step 17: Return the torch to your left hand
After confirming the backup regulator is fully operational, move the torch to your left hand. This step is crucial to ensure that you can use the torch if necessary while you are manipulating the valves.
Step 18: Check and confirm your right-hand valve
Once you have the torch back on your left hand, check and confirm the position of your right-hand post. Every technical valve shutdown drill should conclude with a complete check of all valves.
Step 19: Check and confirm the position of your isolator
Next, check the position of your isolator. The isolator separates the gas supply in your cylinders. It’s important to make sure that the isolator is in the open position. This avoids running out of gas in one cylinder while the other remains full.
Step 20: Move the torch to your right hand and check the position of your left valve
After checking the position of your right-hand post and isolator, return the torch to your right hand. Then confirm that your left valve is open.
Step 21: Signal that your drill is complete
Finally, signal to your team that your drill is complete. This signal is essential to let your team know that you have completed the drill. You are ready to continue the dive.
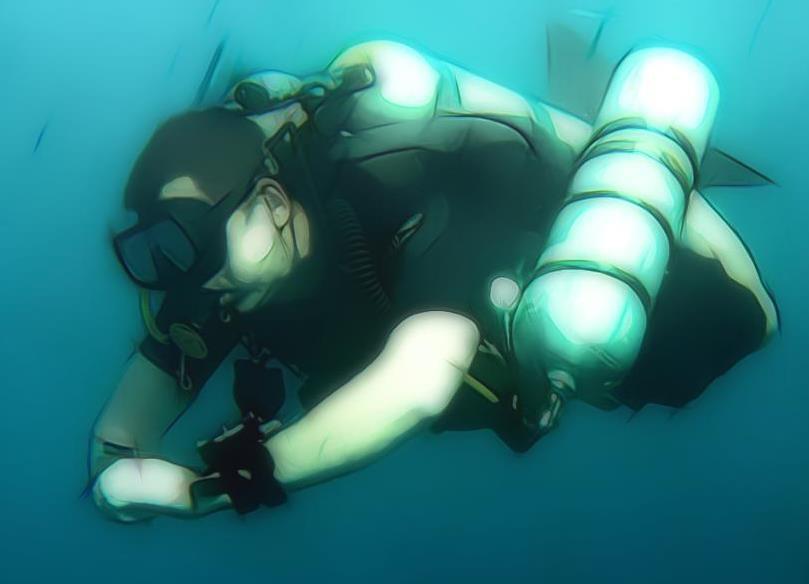
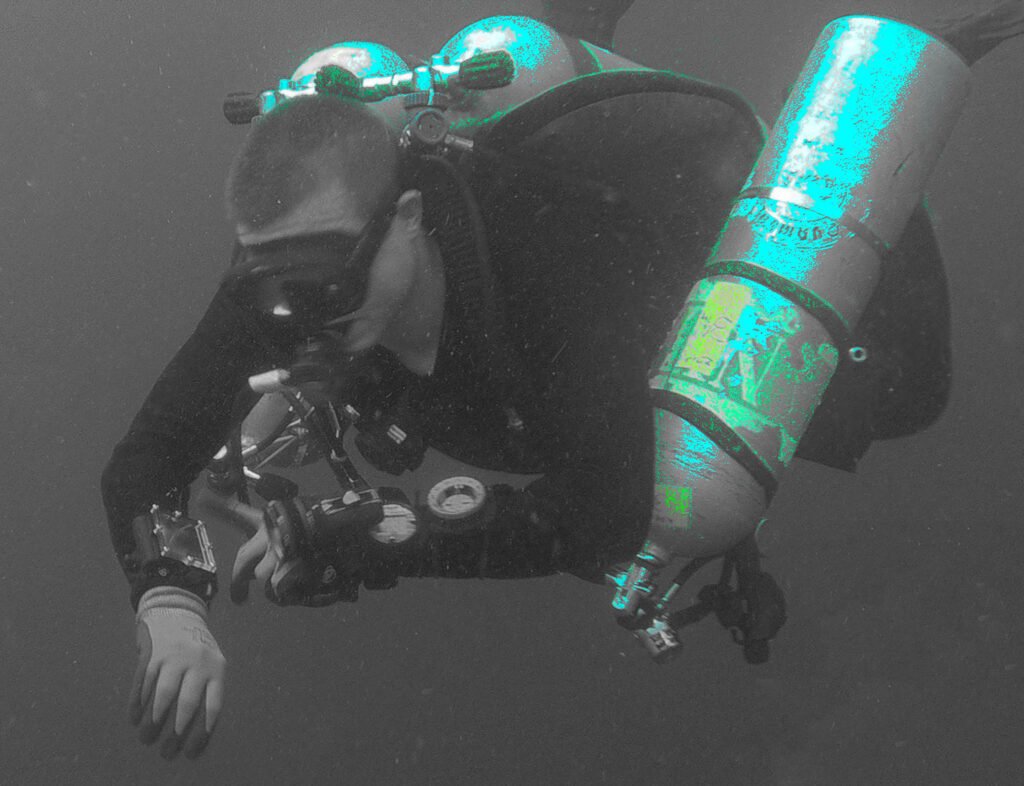
The technical diving valve shutdown drill illustrated
Sponsored Link
Technical diving valve shutdown drill: Conclusion
In conclusion, practicing the technical diving shutdown drill is a critical attribute in improving dive safety. Skill fade occurs quickly when practice is neglected.
By following these 21 methodical steps, you can perform the shutdown drill safely and effectively.
Remember to:
Signal to your team
Check the position of all valves and isolator
Confirm that everything is working correctly
With practice and attention to detail, you can perform the shutdown drill quickly and efficiently. As a result, you ensure a safe and enjoyable dive.
About The Author
Andy Davis is a RAID, PADI TecRec, ANDI, BSAC, and SSI-qualified independent technical diving instructor who specializes in teaching sidemount, trimix, and advanced wreck diving courses.
Currently residing in Subic Bay, Philippines; he has amassed more than 10,000 open-circuit and CCR dives over three decades of challenging diving across the globe.
Andy has published numerous diving magazine articles and designed advanced certification courses for several dive training agencies, He regularly tests and reviews new dive gear for scuba equipment manufacturers. Andy is currently writing a series of advanced diving books and creating a range of tech diving clothing and accessories.
Prior to becoming a professional technical diving educator in 2006, Andy was a commissioned officer in the Royal Air Force and has served in Iraq, Afghanistan, Belize, and Cyprus.
Technical diving skills include gas management, decompression planning, trim and buoyancy control, ascent procedures, and self-reliance. Technical divers must also have strong communication and problem-solving abilities to navigate the unique challenges of deep, complex dives.
How do you become a technical diver?
To become a technical diver, you must complete a specialized training course. These focus on the skills and knowledge required for technical diving. These tech diving courses are offered by many dive training agencies and require a significant amount of time and commitment to complete.
What is decompression planning in technical diving?
Decompression planning in technical diving involves calculating the amount of time required to safely ascend from a dive. Technical divers use decompression tables, dive computers, and specialized software to plan their decompression stops. This ensures they avoid decompression sickness.
How important is trim and buoyancy control in technical diving?
Trim and buoyancy control are critical skills in technical diving. They enable divers to maintain a stable diving position, conserve energy, and prevent violations of the decompression ceiling or deco gas Maximum Operating Depths (MOD).
How to Tie a Regulator Bungee Necklace Technique and video showing how to tie a DIY regulator bungee necklace for your hogarthian or sidemount short hose regulator.