In 2013 I started a project to make a DIY sidemount helmet. The only off-the-shelf option at that time was from Lightmonkey but, like many divers, I found the one-size-fits-all didn’t actually fit me well.
Nearly a decade later, those homemade sidemount helmets are still going strong. I use them myself and have several available to loan for my advanced wreck diving students.
There are a number of features that a sidemount helmet used for scuba diving must have.
Top ventilation holes
No permanently affixed EVA or polystyrene foam lining
Adjustable suspension
Minimal impact protection
Top ventilation holes
Divers inevitably release bubbles and that gas will accumulate inside the helmet unless there are some ventilation holes at the top to allow it to escape. Some helmets come with ventilation holes, otherwise, you can add some yourself with a drill.
No permanently attached EVA or polystyrene foam lining
Unfortunately, most modern climbing and kayaking helmets are designed to be lightweight and built around a solid EVA or polystyrene foam lining. The foam is far too buoyant when you are diving. I’d guess within the region of 1-2lbs+ positive buoyancy; which is distracting at best, and dangerous at worst. Removing these glued-in linings is impractical.
Adjustable suspension
Because foam-lined helmets are impractical, you need to source a helmet that uses adjustable nylon strap suspension for support. If these helmets do also come with foam lining, it is typically either removable soft foam fabric or velcro-detachable EVA/polystyrene blocks.
Minimal impact protection
Diving helmets don’t need the impact protection that comes with products designed for climbing. The main hazard in wreck and cave diving is usually limited to low-velocity collisions. That risk doesn’t necessitate an impact-protection-rated helmet.
Sponsored Link
My DIY sidemount helmet project
I decided to attempt a project to produce my own variant, at a much more economical cost. The entire helmet (not including the GoPro camera!) cost less than $20 USD to make.
DIY sidemount helmet materials:
1x Economy Skateboard Helmet
1x Workman’s Construction Helmet
6x 5mm Stainless Steel Nuts/Bolts/Washers
1x Tube of 3m Ultra-High Bond Glue
1x 1/2m of 5mm bungee cord
Tools used
1x Power Drill with 5mm bit
Leatherman Tool
The use of helmets for overhead environment sidemount diving is rapidly growing in popularity.
They provide a convenient mounting point for backup lights and, if you enjoy filming your dives, they provide a very comfortable and secure mounting point for GoPro HD video cameras and the like.
Impact resistance isn’t a key factor in overhead environment diving.
The diver is unlikely to encounter the type of smashing forces that would be a threat to a climber, skate-boarder or mountain biker. The main danger is low-velocity impacts; minor contusions and abrasions.
I sourced my helmet from the local Manila market; from a market stall that sells cheap skateboarding gear. It cost me 500PHP (about $10.00 USD).
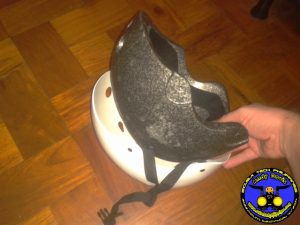
The main criteria when choosing the starter helmet for your DIY project is that the internal foam lining must be removable; whether it is attached by velcro or glued in.
Some examples of suitable options for a DIY sidemount helmet project:
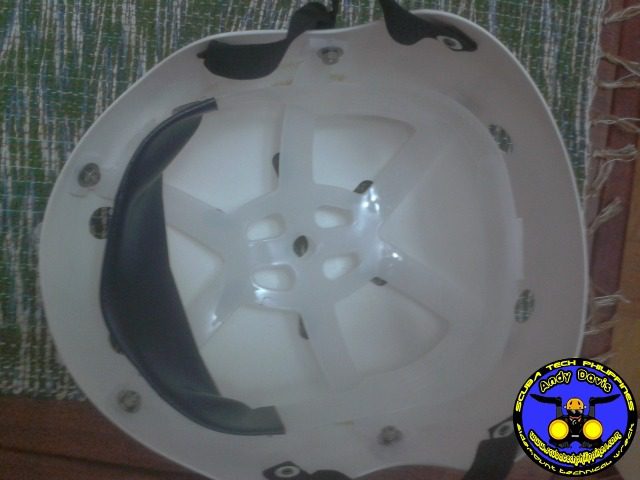
Replacing the sidemount helmet liner
The helmet came with a thick polystyrene liner. The liner has excessive positive buoyancy in the water; making the helmet unwearable as it is.
The solution was to tear out the polystyrene and replace it with something else.
That ‘something else’ was a basic plastic liner from a workman’s helmet. Here in Manila, I can pick up a workman’s construction helmet for 100php (about $2.00) from Ace Hardware.
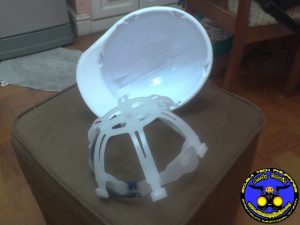
I removed that liner easily because most cheap safety helmets utilize slide-in retention for the suspension liner.
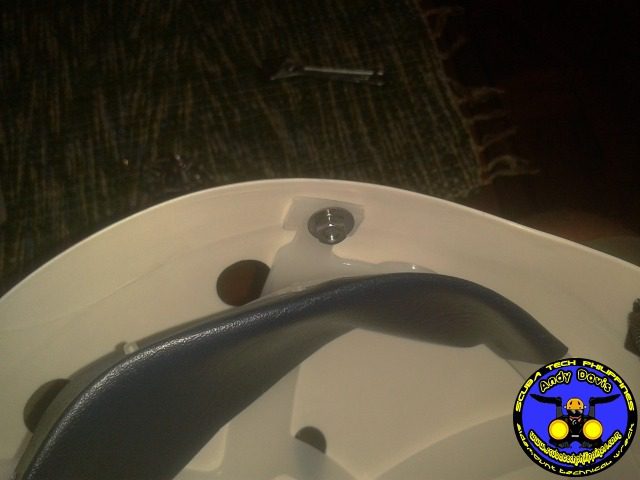
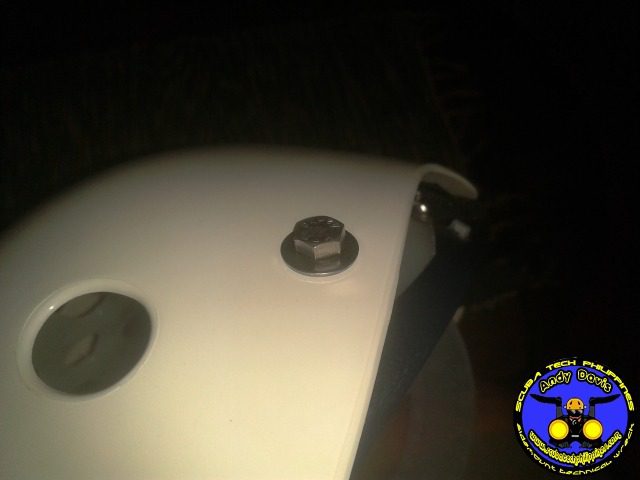
With the suspension liner removed, I then attached it to the skateboard helmet by drilling holes and using marine-grade stainless nuts and bolts to secure it firmly.
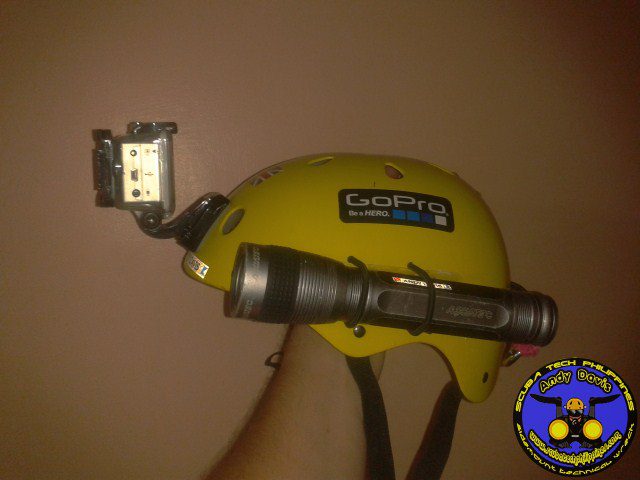
Mounting backup lights
Having fitted a non-buoyant liner, I had a workable sidemount helmet for diving in. The next step was to provide mounts for my backup torches.
I use two, one on each side, for balancing the helmet. This puts both of my backups ready for instant use when needed – no deployment necessary. Alternatively, I can leave them turned on, to provide extra illumination when working in the dark.
When diving specifically to film with the GoPro, I change to wide-angle lights (not my usual backups). These provide a nicer spread of light for video illumination.
The mounts for the backup torches are very simple.
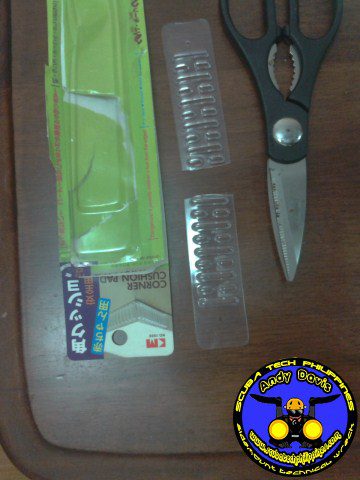
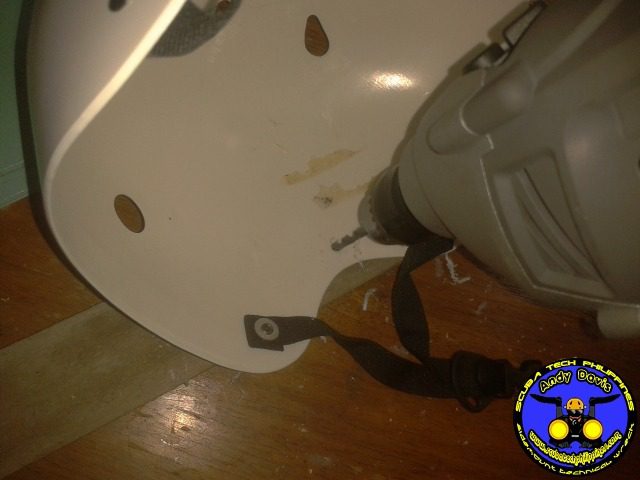
I just drilled four holes into the side of the helmet and threaded some 5mm bungee cord through those holes to provide elasticated loops to grip the torch.
To aid stability I glued some rubber material onto the helmet, under the bungee loops. This aids in gripping the torch against the helmet and prevents the torch from sliding around at all.
The material came from cheap adhesive furniture protectors.
The backup torch mounting was finished off by adding two loops of bungee from inside the helmet (tied around the base of the liner) that run out through the rear vent holes. These permit the torch bolt snaps to be clipped off for additional security.
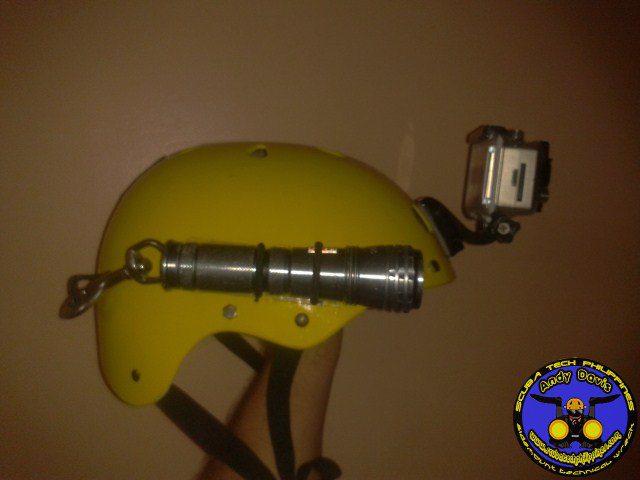
Fitting the GoPro Mount
The GoPro HD Hero2 is really easy to fit. The waterproof housing comes with a selection of curved and flat attachments that glue into place. I used a curved attachment – you just peel off the backing and stick it in position. It uses 3m Ultra-High Bond adhesive, so is more than secure.
Optional Bungee Chin Strap
I’ve experimented with a bungee strap on one of the helmets. This replaces the nylon strap and quick-release buckle that comes attached. This does tend to keep the helmet very snug and is easy to get on/off.
On those, the QR buckles allow them to don and doff the sidemount helmet, without needing to remove the mask and take the regulator out of their mouths. That’s a teaching consideration – but in all other aspects of usability, I prefer the bungee strap.
The bungee strap is easily fitted. I simply drilled 4 holes in the helmet (near the existing attachments for the nylon chin strap. Through these, I threaded a 5mm bungee. The bungee was threaded to form two interlocking loops – one from each side. To add comfort, I slid some rubber tubing over the bungee (covering the over-lock).
A few more photos from the project:
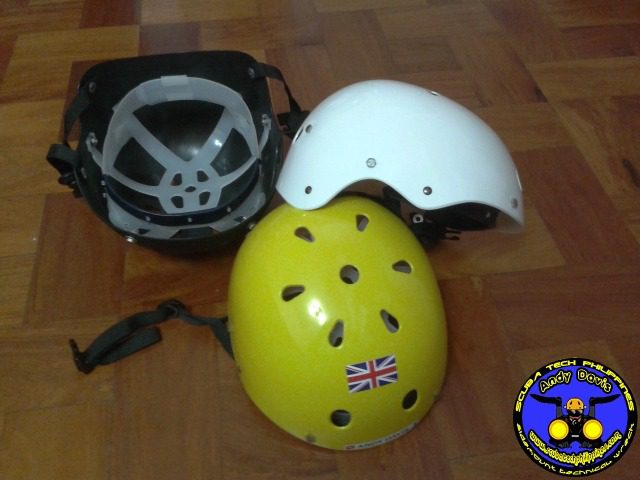
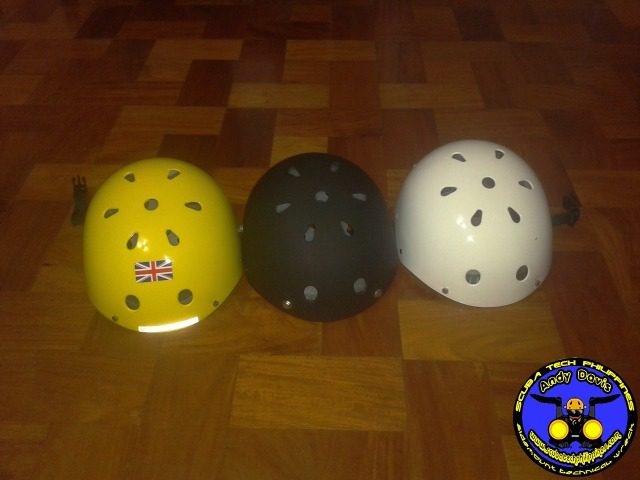
I made three helmets.Outside detail of helmet liner attachment.
Drilling holes for lights.My first three helmets. Yellow is the best colour for visibility. Black… just because.
Currently residing in Subic Bay, Philippines; he has amassed more than 10,000 open-circuit and CCR dives over three decades of challenging diving across the globe.
Andy has published numerous diving magazine articles and designed advanced certification courses for several dive training agencies, He regularly tests and reviews new dive gear for scuba equipment manufacturers. Andy is currently writing a series of advanced diving books and creating a range of tech diving clothing and accessories.
Prior to becoming a professional technical diving educator in 2006, Andy was a commissioned officer in the Royal Air Force and has served in Iraq, Afghanistan, Belize, and Cyprus.
What are the benefits of sidemount diving? An honest explanation of the benefits of sidemount diving. The pros and cons of sidemount versus backmount gear for recreational, technical and cave divers
Ultimate Guide to Sidemount Cylinder Trim Sidemount cylinder trim is a headache for many sidemount divers. This illustrated guide will help you diagnose the problem & find the solution
The History of Sidemount Diving A complete guide to the history of sidemount diving: how it evolved and the principles that were shaped from differing environmental needs.
Love your helmet! Thanks so much! I opted for the bungee chin strap which I love. I removed the straps completely using a hand held power drill to thin out the grommets from the inside until I could pull them out easily. Using the same original holes I replaced the straps with bungee making two loops with a bit of plastic tubing to make a chin strap that pulled the two loops together as shown above. The chin straps conveniently pop up and stay on the front of the helmet between dives, so you just put on the mask, place the helmet over your head and stretch out the bungee out and over the mask with your thumbs and tuck it under your chin in one smooth move. I used wider angle video lights with back end on and off buttons which is also very convenient for rapidly changing environments. Great for diving, great for video! Thanks again!


Love your helmet! Thanks so much! I opted for the bungee chin strap which I love. I removed the straps completely using a hand held power drill to thin out the grommets from the inside until I could pull them out easily. Using the same original holes I replaced the straps with bungee making two loops with a bit of plastic tubing to make a chin strap that pulled the two loops together as shown above. The chin straps conveniently pop up and stay on the front of the helmet between dives, so you just put on the mask, place the helmet over your head and stretch out the bungee out and over the mask with your thumbs and tuck it under your chin in one smooth move. I used wider angle video lights with back end on and off buttons which is also very convenient for rapidly changing environments. Great for diving, great for video! Thanks again!