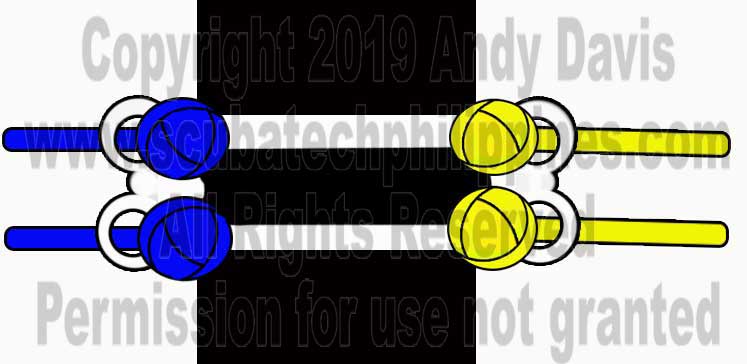
I’ve found that sidemount Loop Bungee are the most popular with my students and offers the most refined cylinder trim, along with the easiest cylinder don/doff routine.
This option is getting increasingly more popular in the sidemount community, especially with those diving ‘Mexican Cave’ style systems. However, some divers find the configuration and setup to be confusing… it’s actually pretty simple.
Here is my illustrated guide on how to set up and size loop bungees for sidemount.
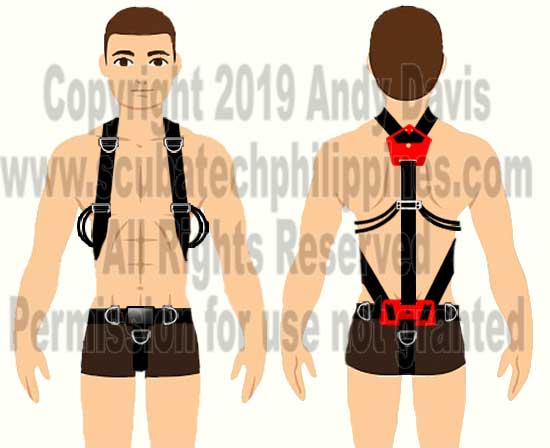
You need three pieces of hardware for your harness:
A retainer on the rear spine strap from which your bungees will originate.
Two attachment points on the front shoulder straps.
These need to be set, front and back, at the same height, just immediately below your armpit. The bungees need to run horizontally front-to-back, otherwise, they can drag the cylinder valves out of position below your armpits; which will ruin your cylinder trim.
You will also need approximately 2 meters of sidemount bungee. 6mm (approx 1/4″) bungee works best for most divers. However, if you are using very heavy/high-capacity steel cylinders, you may want to increase the bungee size to 8mm or even 10mm in extreme cases.
Once the tri-glide is correctly positioned on your spine webbing strap, it’s a simple task to thread the bungee through the holes and secure each end with a basic overhand knot.
Sponsored Link
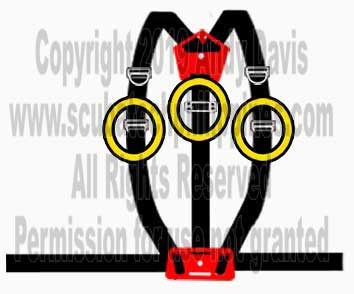
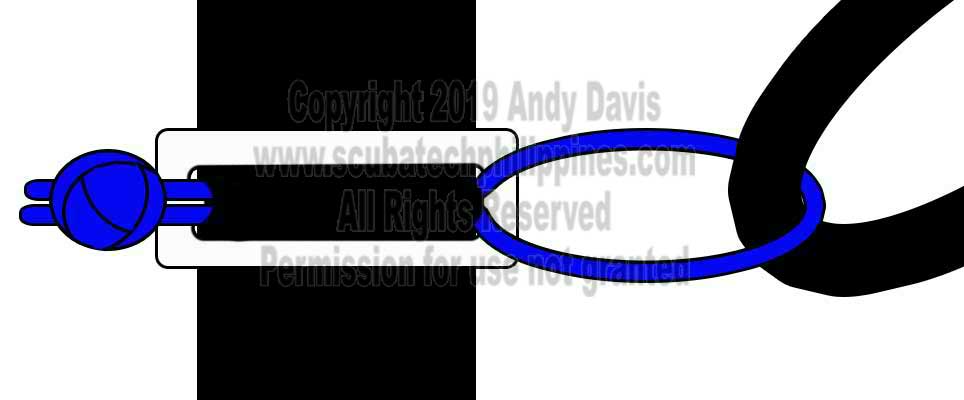
The Rear Loop Bungee Attachment
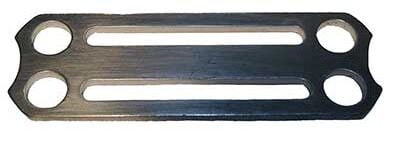
My personal preference for a rear loop bungee attachment is a custom piece of hardware. It’s basically an extended webbing tri-glide with four holes for the bungee to thread through.
These are sold by several specialist sidemount manufacturers, but I got mine from Andrew Goring at SUMPUK.
The top tri-glide secures the top end of the bungee for both left and right sides. The bottom tri-glide secures the bottom bungees, both left and right sides. Again secure the ends with a simple overhand knot.
If you don’t want to source custom hardware, you can use regular tri-glides; as sold by just about any scuba diving shop. With these, you thread the bungee between the webbing and the tri-glide. You’ll probably need two tri-glides, otherwise, it’ll get too crowded. Both are set up as shown in the diagram below.
Want a PDF copy of these instructions? It’s in my eBook…
Buy my ‘Sidemount: Principles For Success’ ebook now!
My comprehensive guide to sidemount configuration and development as a diver.
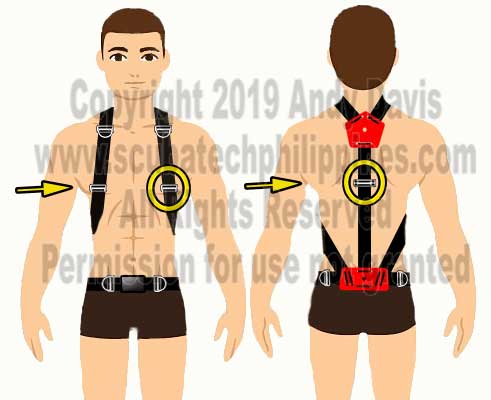
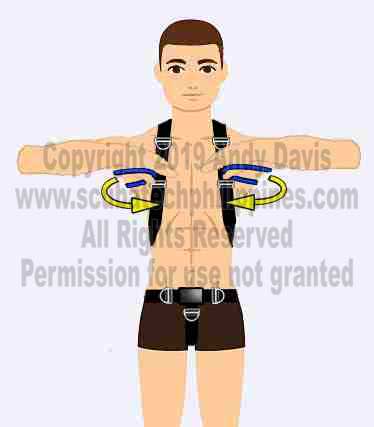
There are two options that I use for the front bungee attachment on the shoulder straps. You can either elect for a fixed, or a sliding loop bungee arrangement.
The fixed loop bungee is the most common. This requires more initial adjustment but keeps the cylinder valves exactly where you want them throughout the dive.
In contrast, a sliding (or floating) loop bungee arrangement allows the front attachment to move up or down the shoulder webbing as you need it. I prefer this for my sidemount rigs that I use for very confined areas and passing tight restrictions in wrecks. Having some flexibility to move the attachments down empowers more capacity to squeeze and wriggle through small spaces.
Fixed Loop Bungee
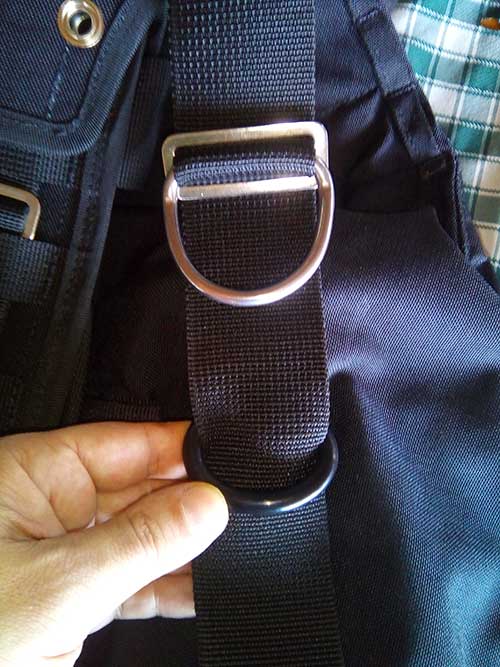
A Fixed Loop Bungee front attachment is simply a basic tri-glide with a small, knotted, loop of 550 cord threaded between the tri-glide and the webbing. The loop bungee passes through this loop of 550 cord.
You can buy 550 cord (parachute cord) at most camping, climbing or military surplus-type shops. It’s also commonly available on Amazon and eBay. This cord is also optimum for your lower cylinder leash, and if you put a leash around the sidemount cylinder valve for security.
The length of the 550-cord loop needed is determined by your chest size. It’s individually sized to the diver.
The loop has to be long enough that it isn’t pulling your bungee forwards of the armpit area. If it is too short, then the cylinder valve gets pulled forwards and lies nearer your chest, rather than under your armpits. That, in turn, means the valve will be forced downwards; and the cylinder base will rise upwards in a see-saw effect. It can ruin your cylinder trim.
Fixed loop bungee
The photo above shows a very short 550-cord. This was suitable for a diver with a petite figure.
While the cord has to have enough length that it isn’t pulling your bungee forwards, it shouldn’t be excessively long either. That would lead to slackness in the bungee; allowing too much cylinder valve movement to occur.
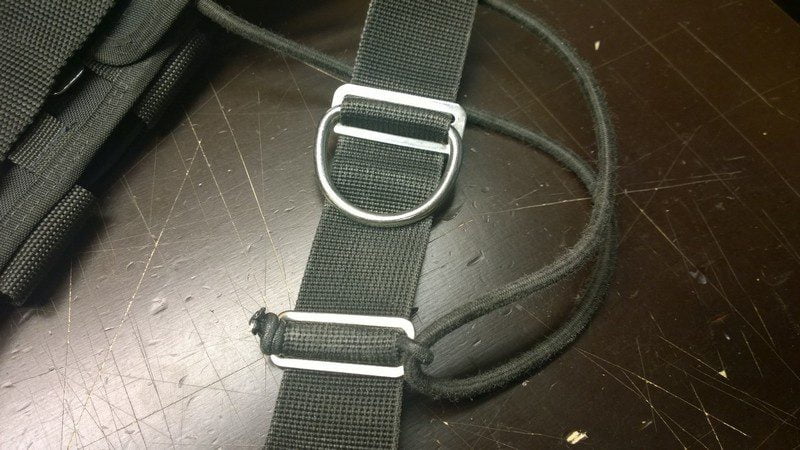
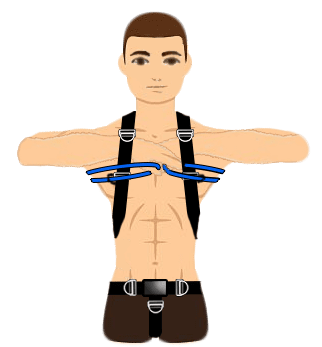
Sliding Loop Bungee
The sliding loop bungee is my personal preference. Many divers make these by simply tying a loop of 550 cord, or even a 6-8mm bungee around the shoulder harness and threading the bungee through that.
I personally feel that it slides too easily down the webbing. There’s a better solution, offering the same sliding functionality, but with a little more consistency in location. What I use are large rubber O-rings. I got the idea from XDeep; who use those same o-rings as sliding D-rings on their waist harnesses.
Using a rubber o-ring adds slightly more friction and reduces the tendency for the attachment to always slide down to the bottom. It stays put where you want it; unless you deliberately move it. Simply thread an o-ring onto each shoulder harness strap. Run the bungee through that o-ring.
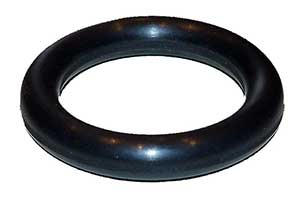
This photo illustrates the o-rings I use. They are 50x8mm (metric) or 2″x0.3″ (imperial). You can buy these at any good plumbing supplies store; plus some specialist sidemount retailers also sell them.
Here is a picture of the o-ring bungee retainer in place on a sidemount rig:
Sizing Loop Bungees
Getting the basic sizing for loop bungees is relatively simple.
Firstly, remember to account for your exposure protection. If possible, do the sizing and adjust wearing the exposure protection (wetsuit/drysuit) that you’ll be using.
You want the bungees to be relaxed – without tension, but not hanging too loose, from the front attachment.
Then you can test the fitting. Simply insert your thumbs into the upper strand of the bungees. Pull the bungees across the front of your chest.
They should reach your nipples under strong tension.
Pull them together even harder and they should meet together at your sternum under maximal/complete tension. This should require some effort to stretch them.
If they were any looser than this, the cylinder valves would dangle down below you; and that’d pivot your cylinders out of horizontal trim.
You need to remember to check your bungee tension every year, or ~100 dives because they lose elasticity over time and with repeated stretching. When they lose elasticity, you will lose cylinder trim. Replace them when necessary.
Once you’ve got them sized so that they work for the test, above, the only thing left to do is to get into the water and put your cylinders on. If properly configured and sized, your cylinders should hang in good trim. See this article about sidemount cylinder trim.
It should look like this:
Loop bungees work best when you place your lower cylinder attachment at 90 degrees; directly under the valve stem/manifold plug on the valve.It is important to get your cylinder band at the correct height. For instructions on that process, please see HERE.
The valve should be directly behind your armpit, on the side mid-line of your torso. The regulator 1st stages should be rotated inwards between your cylinder and your body. The cylinder valve handle should be pointing upwards.
I hope that helps some people. If you’re having problems with your own sidemount configuration, please do drop me a line – I’m happy to help. Video or photos do help with a diagnosis
Currently residing in Subic Bay, Philippines; he has amassed more than 10,000 open-circuit and CCR dives over three decades of challenging diving across the globe.
Andy has published numerous diving magazine articles and designed advanced certification courses for several dive training agencies, He regularly tests and reviews new dive gear for scuba equipment manufacturers. Andy is currently writing a series of advanced diving books and creating a range of tech diving clothing and accessories.
Prior to becoming a professional technical diving educator in 2006, Andy was a commissioned officer in the Royal Air Force and has served in Iraq, Afghanistan, Belize, and Cyprus.
Building Homemade Sidemount Equipment Setup My thoughts and advice about attempting homemade sidemount gear projects. What does it take to create optimal DIY sidemount systems?
Top-5 Best Sidemount Fins 2024 Choosing the right set of sidemount fins is an important decision. They have a profound effect on diver trim and control. With that recommendation in…
Ultimate Guide to Sidemount Cylinder Trim Sidemount cylinder trim is a headache for many sidemount divers. This illustrated guide will help you diagnose the problem & find the solution
What is a sidemount pouch or pocket? A sidemount pouch, or pocket, is used to stow ancillary diving equipment when sidemount diving. It clips to square D-rings on the read harness via…