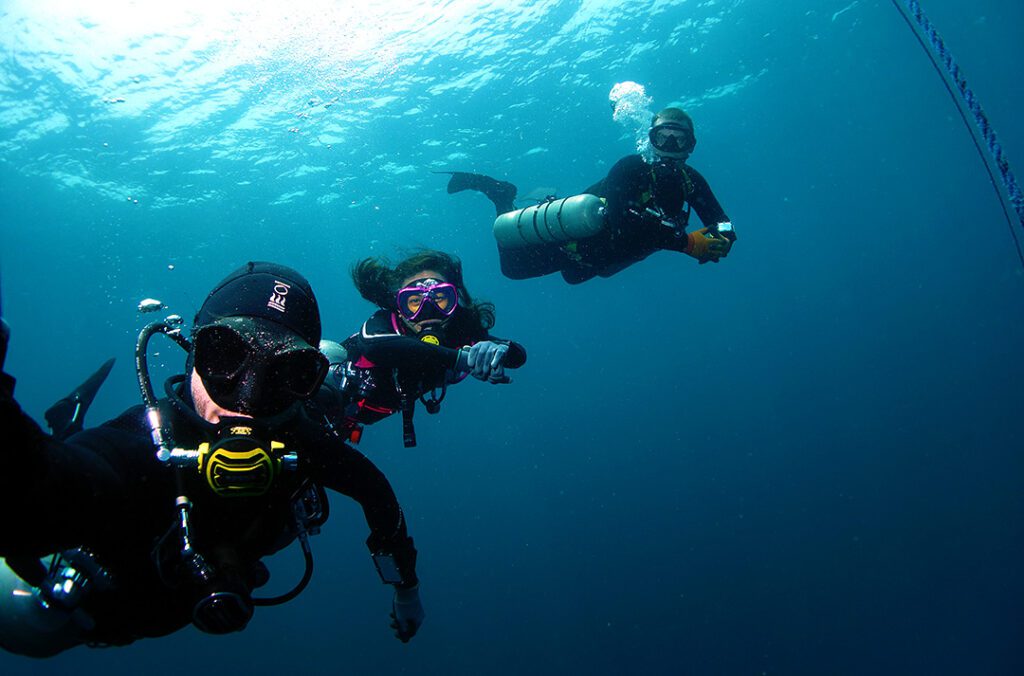
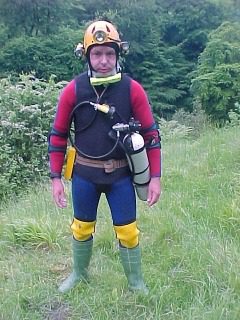
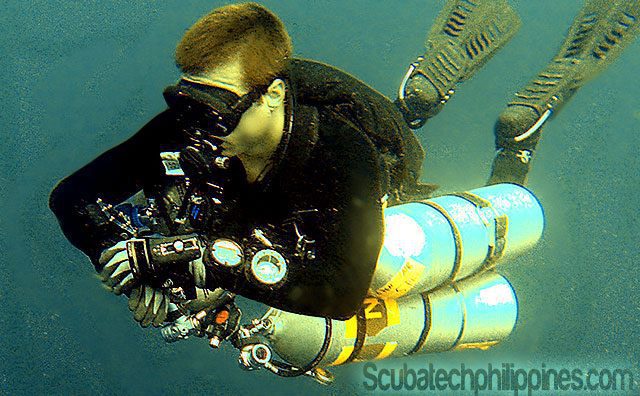
Sidemount diving involves carrying 2 or more scuba cylinders secured to the side of the body and in line with the torso; with no cylinders worn on the diver’s back.
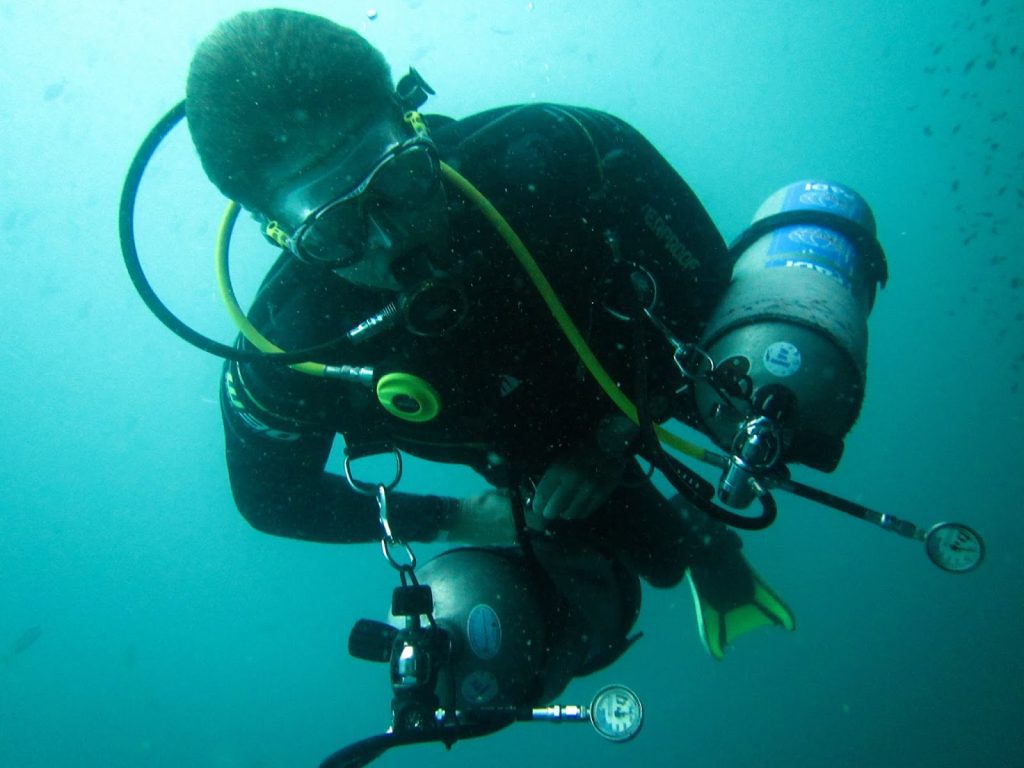
A common feature that defines sidemount configuration is the use of bungee cords to provide an upper attachment on the cylinder valve, normally routed from behind the diver’s upper back, whilst the lower cylinder is secured to the diver’s lower harness (butt-plate or waist D-rings) via bolt-snaps.
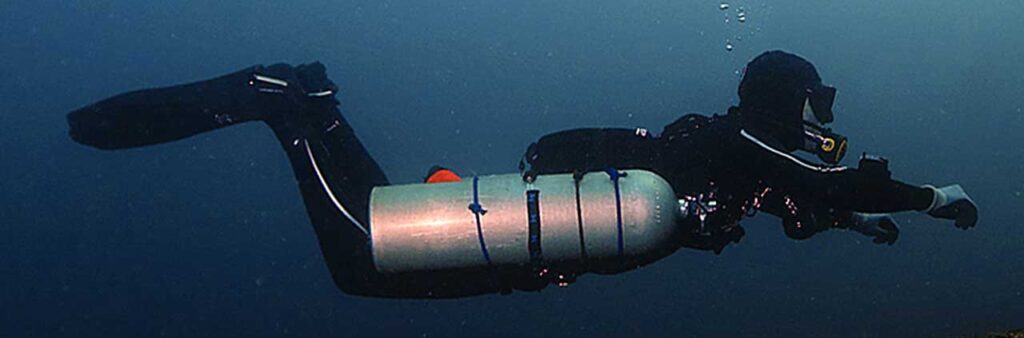
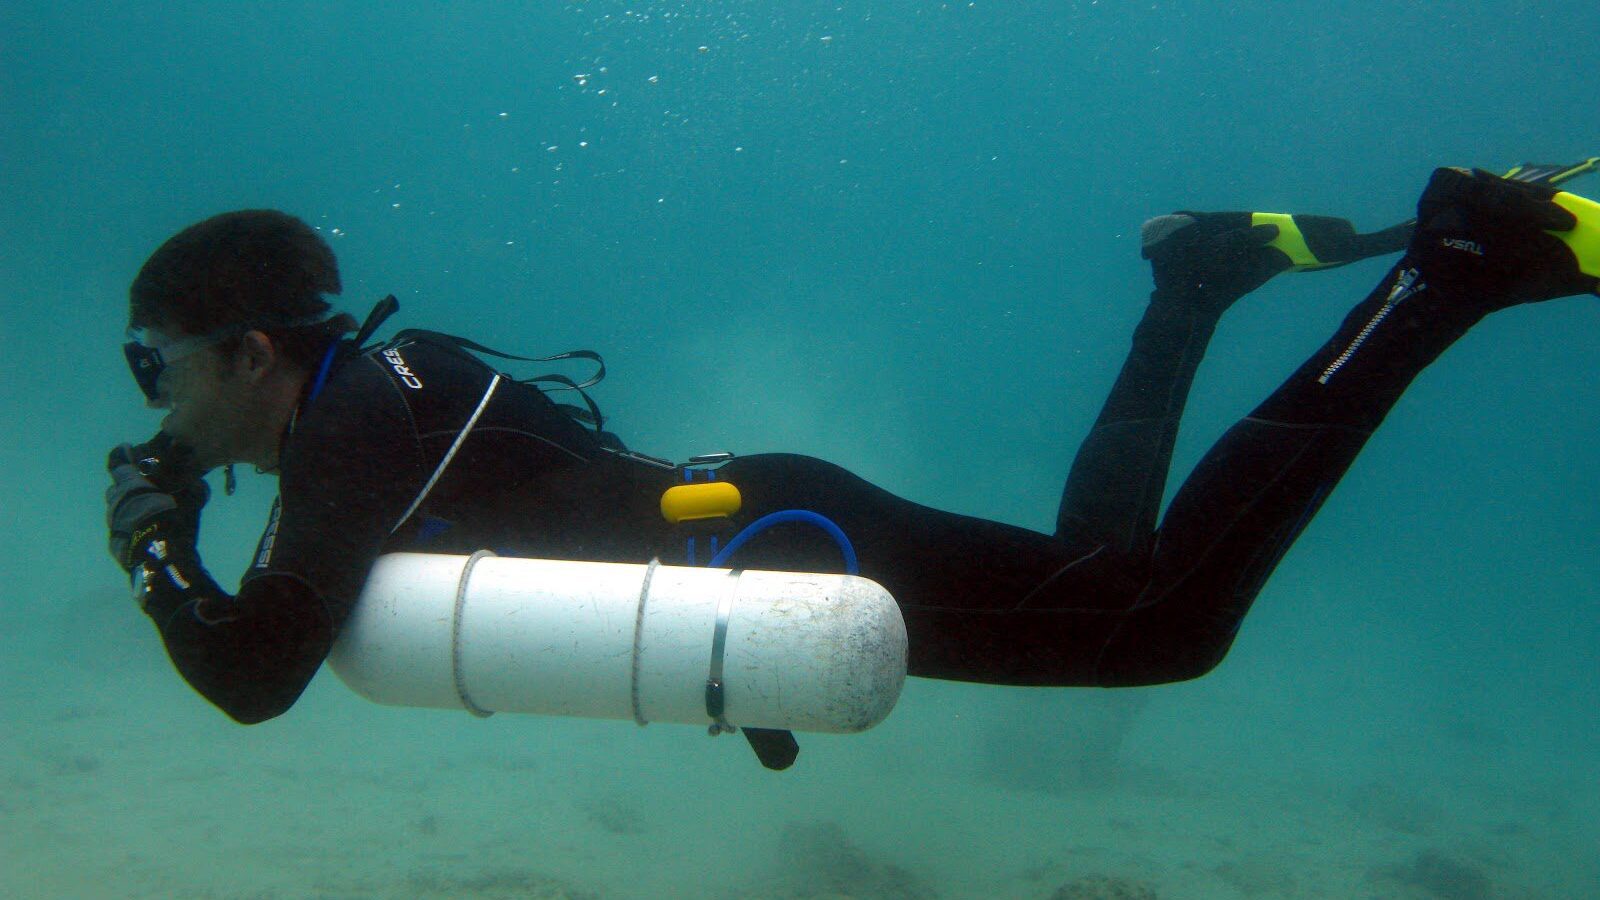
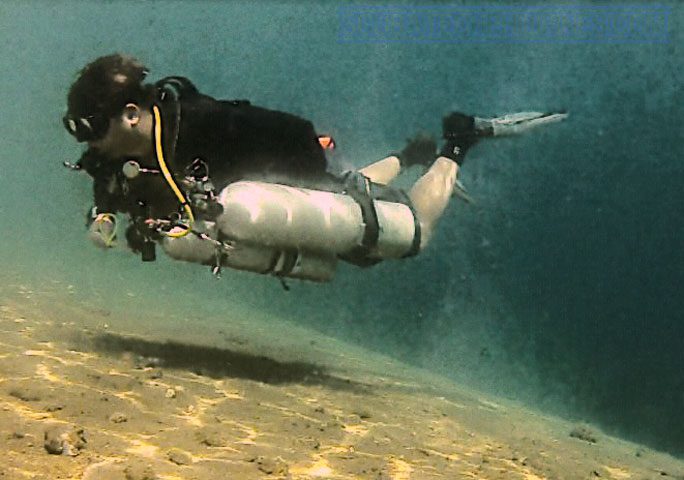
A properly trained and configured sidemount diver is expected to be highly streamlined in the water, with their cylinders perfectly trim along the side of their torso. The cylinder valves/regulators should be just under the armpits, with the cylinder in-line with their body; not floating above, or sinking below, their torso.
Sponsored Link
How else can sidemount be used in diving?
Sidemount has niche uses beyond being an equipment-focused method of scuba diving:
Sidemount rigged deco/stage/bail-out on backmount systems
Stage-only diving
Monkey diving
No-mount diving
Sidemount Stages / Bail-Outs
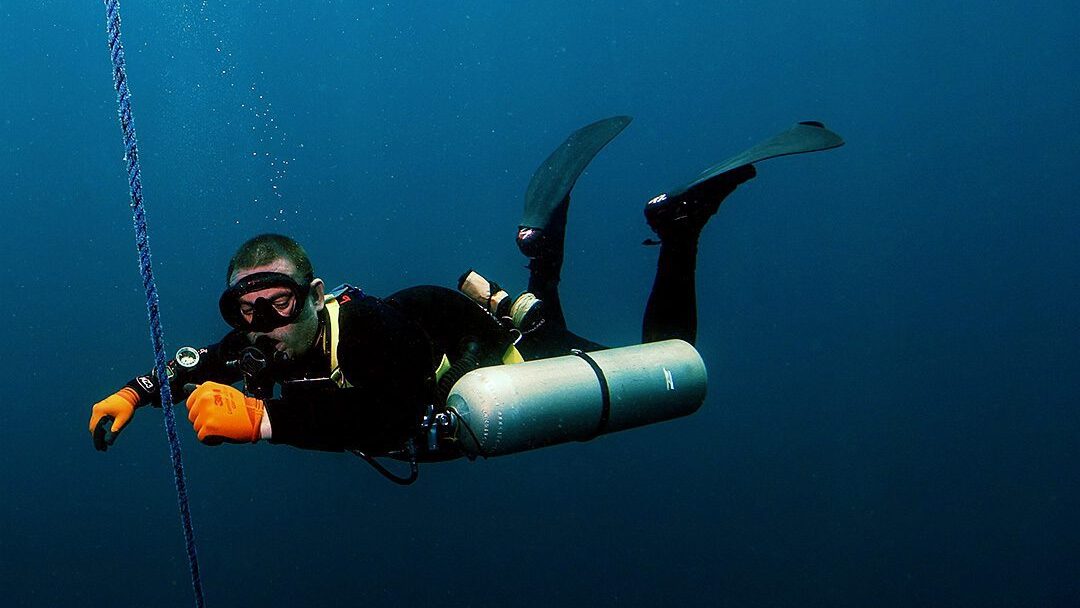
Sidemount staging is the practice of using sidemount configuration (bungee loops and/or buttplate rails) as a means for stowing stage/deco cylinders in a streamlined manner against the sides of the torso when otherwise diving in back-mounted doubles or CCR.
Deco cylinder sidemounted on a backmount OC rig
Stage-Only Diving
Stage-only diving refers to the use of standard deco/stage cylinder configuration, without back-mounted cylinders, on an otherwise standard, or partially modified tec/rec BCD. The lower cylinder is attached to waist D-Rings and the upper cylinder to shoulder D-Rings, both via direct bolt-snap.
Some divers, untrained in proper sidemount diving techniques, incorrectly assume this approach to be sidemount diving.
Staged rigged (clipped off) tanks without bungees are not sidemount.
No bungee cord is utilised in the upper attachment, causing the cylinders to hang low beneath the diver and not in line (parallel) with their torso beneath their armpits. Without modification of the BCD design, the lack of back-mounted cylinders also causes taco’ing of wing designs and considerable instability.
Monkey Diving
Monkey diving is the term used to describe the use of sidemount configuration/procedures, whilst only carrying a single cylinder.
It is presented as an option on some recreational level sidemount courses (dependent on agency) and may also be a considered strategy for certain overhead-environment (cave/wreck) penetrations.
The use of a single cylinder may require a strategy of counterweighting to prevent diver instability in the water.
Single tank sidemount (monkey diving) can be an amazingly minimalist experience.
No-Mount Diving
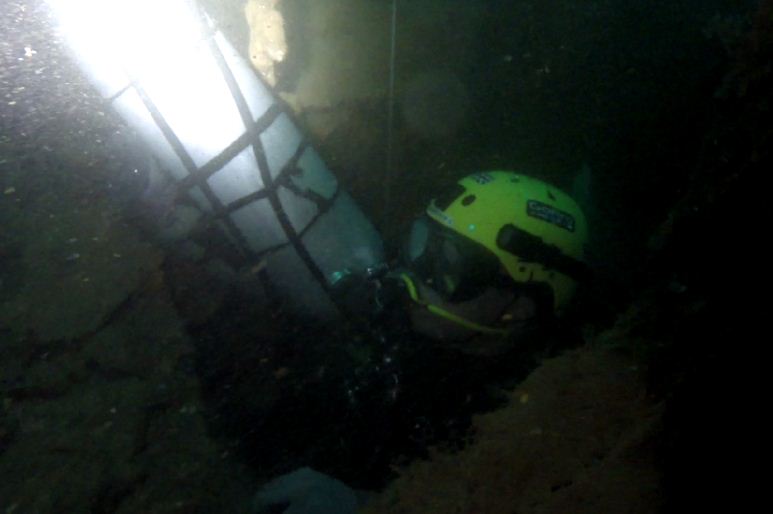
No-mount diving is a specialized overhead-environment strategy for dealing with particularly tight restrictions.
This may involve divers wearing a very basic harness under their existing configuration, or simply hand-carrying cylinders.
Upon reaching a restriction through which they couldn’t otherwise pass, they will ‘strip down’ out of their primary gear, hand-hold or attach a cylinder/s to their ‘no-mount’ harness and move forwards.
Courtesy of www.santiagodivingmexico.com
A ‘no-mount’ harness can consist of nothing more than a weight belt with several D-rings attached.
The evolution of sidemount techniques and configurations has largely made this approach unnecessary, as a minimalist sidemount harness/BCD can be worn beneath back-mounted doubles or even a CCR.
What are the benefits of sidemount diving?
The following factors are often cited as benefits of sidemount diving
The sidemount diving approach offers divers significant benefits to the flexibility of their approach. Unlike back-mounted doubles, acquiring and transporting sidemount suitable cylinders is often much more convenient and accessible.
Sidemount diving configuration allows the travelling diver to conduct technical and/or overhead environment dives without having to source traditional back-mounted cylinders. When diving in remote locations, the transportation of diving logistics, especially by hand, is considerably less physically taxing.
Sidemount diving equipment is also considerably lighter, and less bulky than back-mounted alternatives – allowing for easier and cheaper (considering the rate of many airlines’ excess baggage costs) travel.
Sidemount diving benefits: Accessibility
Unlike back-mounted cylinders, the sidemount diver has immediate access to, and observation of, the regulators and tank valves of their cylinders. This enables immediate problem identification and allows swifter resolution, without recourse to ‘behind the head’ shut-down drills that require a higher level of mobility, flexibility and freedom to operate.
Sidemount diving benefits: Streamlining
Sidemount diving configuration places the cylinders under the diver’s armpits, in line with their body. This decreases water resistance (improving air consumption and reducing fatigue) whilst also allowing the diver to pass through smaller restrictions than would otherwise be possible in back-mounted cylinders.
The flexibility to remove tanks, and propel them in front, allows the diver to pass through very small passages and holes – being limited only by the size of their bodies and exposure protection.
Of course… this is ONLY true if the sidemount diver is properly trained on how to streamline and trim themselves and their cylinders…
Sidemount diving benefits: Safety
Increased accessibility to life-supporting regulators, first-stages and valves improves the efficiency and speed of critical cylinder shut-down procedures. This allows immediate gas-loss identification and provides the diver with quick access to alternative safety procedures. These procedures may include; regulator swapping (between cylinders), valve-feathering to access gas within a cylinder whose regulator is malfunctioned/free-flowing or even breathing directly from a tank valve.
In addition, storage of the cylinders next to the diver’s torso, and beneath his armpits, serves to protect vulnerable valves and regulator first-stages from collision, impact and abrasion damage, or accidental shut-down through contact with a ceiling. It also significantly reduces the risk of entanglement behind the diver, where it is least easy to rectify.
Sidemount diving benefits: Comfort
Many divers will testify that the sidemount diving configuration offers greater stability and easier-to-attain trim and control in the water. It is also less physically tiring to carry, and get into, sidemount equipment than with traditional back-mounted doubles. This can be especially when operating from a small boat or a rough shore entry.
The ability to attach, remove and replace cylinders whilst in the water allows the diver to avoid ever having to carry heavy-weight back-mounted cylinders. This is combined with reduced physical exertion when conducting regulator shut-down procedures, which is a major benefit to technical divers who suffer from shoulder or back discomfort or reduced mobility from old injuries.
Sidemount diving benefits: Gas redundancy
Whilst technical divers have always utilized a redundant gas system, either isolated-manifold or independent back-mounted cylinders, recreational divers have traditionally resorted to using ‘pony cylinders’ or ‘ascent bottles’ as contingencies against out-of-air emergencies.
Whether attached to the primary cylinder, or slung at the chest, these cylinders often presented problems with stability and streamlining, whilst simultaneously only providing a bare minimum supply of air for an emergency ascent.
Sidemount diving with two cylinders helps resolve stability and streamlining issues and ensures that a truly capable redundant supply of air is maintained.
Technical divers debate the pros and cons of independent cylinders versus isolated-manifold doubles. Back-mounted manifold cylinders provide easy access to complete gas supplies, in the event of a regulator failure and shut-down.
However, the manifold itself creates additional o-ring failure points and a failure in that component will deprive the technical diver of, at least, ½ of his remaining gas supply. Independent cylinders, when sidemounted, provide true gas redundancy, whilst offering access (via regulator switching or valve breathing) to all remaining gas.
Buy my ‘Sidemount: Principles For Success’ ebook now!
My comprehensive guide to sidemount configuration and development as a diver.
178 Pages. PDF format.Only $25
Fully Illustrated!
Chapters include:
Sidemount history, design styles, and cylinder principles
Sidemount began originally in the UK as a technique used in sump diving. By the 1970s it had emigrated across the Atlantic and began to be used within the Mexican and Florida cave-diving communities. In 2012 sidemount went mainstream when it was adopted by many of the large recreational dive training agencies as a speciality course. Over the last decade, it has surged in popularity across the globe and has become an active community on social media.
The 1960’s – UK sump diving
The concept of side-mounting cylinders originated from cave diving in the UK, during the 1960s.
During ‘dry’ explorations of Wookey Hole, the River Axe and other underground systems, divers occasionally encountered submerged passages that blocked further exploration.
These cavers began incorporating SCUBA equipment specifically to progress beyond underwater areas.
However, because they operated in very confined spaces, and most exploration remained primarily ‘dry’, they began experimenting and improvising with extremely minimalist configurations, minimizing bulk, allowing cylinders to be easily removed/replaced and retaining the capacity to squeeze through the tightest restrictions.
A very early sidemount rig for sump ‘diving’ in the UK
The nature of these ‘dives’ in cramped sumps did not prioritize the need for buoyancy control or underwater propulsion – so the bare minimum needed was a mask, a cylinder, a regulator, a method of attachment to the body and, only on rare occasions, a set of fins.
The ‘English system’
English cave explorer with ‘sump bottle’ side-mounted
Many of these early sump explorers adopted an approach based upon a sturdy belt, with an attached cam-band, that allowed a cylinder to be dropped in and carried alongside the outer thigh.
This allowed them to crawl, or wriggle, through the dry cave sections, whilst presenting a secure method of attachment for passing through submerged areas.
Swimming efficiency, reduced water resistance, trim and buoyancy control were not generally required due to the nature of those caves.
At the time, this approach to ‘wet’ cave exploration was generally called the ‘English System’.
The 1970’s – Florida & Mexico
During the 1970s the ‘English system’ began to be incorporated by American cave divers, operating in Florida and Mexico.
Those cave systems were predominantly ‘wet’ and involved prolonged swimming with SCUBA; thus, more emphasis was paid towards developing the diving performance of the system, in particular, buoyancy and trim.
Divers required buoyancy control devices for extended fining and began shifting the location of the cylinders from against the thigh, up to the armpit/against the torso.
These exploratory-level cave divers began by making their own systems, using and adapting ‘off-the-shelf’ SCUBA equipment for their needs or creating configurations ‘from scratch’, based upon webbing harnesses and improvised bladders for buoyancy. This led to the ‘American’ style of sidemount BCD design.
Where aluminium cylinders were more popular, a lightweight approach using improvised bladders; such as the MSR Dromedary hydration system (like a ‘Camelbak’) was adopted.
This was the modern ‘British’ system, in which improvised bladders would be sewn/bolted to the rear of a bare webbing harness and operated by orally inflating and deflating through the adapted ‘drinking tube’.
The 1990s – The first commercial rig
In the mid-1990s, Dive Rite produced the first commercial sidemount diving system, focused on the newly released ‘Transpac’ harness. Other cave divers continued to manufacture their own D.I.Y. configurations.
At this time, the use of sidemounted configuration was primarily restricted to a small number of exploration-grade cave pioneers.
The widespread popularity of sidemount diving systems did not emerge until the mid-2010s. A growing interest in technical and cave diving, empowered by more resources being accessible online, soon exposed divers to the concept of sidemount diving.
It was received as an alternative approach that matched the minimalism and functionality of popular ‘DIR/Hogarthian’ back-mounted systems with the advantages of flexibility, comfort, accessibility and potential safety.
The 2000s – Cave diving popularity & sidemount evolution
The increasing interest in sidemount diving configurations prompted several manufacturers, and individuals, over the last few years to design and sell their own designs of a sidemount system.
Manufacturers like Hollis, OMS and UTD all developed and released sidemount equipment.
Simultaneously, Steve Bogaerts (a UK-born cave pioneer, who lives and cave-dives in Mexico) released the very popular ‘Razor’ system and began providing a model-specific training program for his rig.
At this time, several technical scuba agencies developed formal sidemount training programs and incorporated sidemount diving configuration as an equipment option within existing technical diving programs.
The evolution of sidemount BCD design is heavily favoured by regional influences. The ‘British’ (Mexico cave) and ‘American’ (Florida Cave) approaches to sidemount equipment design are heavily influenced by local environmental and equipment factors.
The late 2000’s – Sidemount diving goes mainstream
When PADI instructor, Jeff Loflin, devised a distinctive sidemount diving speciality course, it proved extremely popular, being replicated by many PADI technical-level instructors. This soon led to PADI devising standardized sidemount diving programs at both recreational and technical levels. That adoption by a leading dive agency truly cemented sidemount as an increasingly attractive and mainstream option for both recreational and technical divers alike.
Nowadays, virtually every diving agency offers sidemount training at both recreational and technical diving levels; and there are many dozens of sidemount BCDs available to purchase from major scuba equipment manufacturers and smaller, specialized producers.
However, the rapid expansion in sidemount diving popularity has also led to many fast-track sidemount instructors being created. Instructors with no interest or history in sidemount diving, who are merely seeking to ‘cash in’ on what they see as a popular trend. This has created a potential ‘minefield’ that the aspirant sidemount diver has to negotiate.
It is very important to ascertain whether a potential sidemount instructor truly possesses the expertise and significant experience in, what is, a truly specialized area of scuba equipment training.
Basic sidemount training is offered by most dive training agencies. This level of training aims to develop initial equipment familiarity and operation. At this level, students are taught to adjust, fit and operate the sidemount rig, whilst diving with 2 cylinders maximum.
These training courses then develop core diving skills that are specifically relevant to sidemount – namely; trim, buoyancy, alternative propulsion techniques and cylinder handling in the water.
Many basic courses also teach supplementary diving skills, such as DSMB deployment and variations on open water skills, such as inverted (upside-down) fining and inverted mask-clearing. Knowledge development covers topics like; gas management, dive planning and equipment considerations/options. The typical timescale for a level 1 sidemount course is 2-5 days, depending on content and quality.
Level 2 – Technical sidemount
Technical sidemount courses develop beyond basic recreational sidemount skills with a focus on technical/decompression diving activities.
A higher level of equipment proficiency and diving skill is required, as 2-4 additional stage/deco cylinders will be added to the rig, enabling mixed-gas and accelerated decompression procedures to be conducted.
Technical Sidemount courses enable qualified technical divers to ‘cross-over’ from back-mount to sidemount technical diving. They will learn how to rig stage/deco cylinders for effective sidemount use; and will practice all critical technical diving skills in sidemount configuration. These courses often comprise intensive shallow water training, followed by progressively challenging technical dives, to ranges dependent on the student’s existing qualification level.
Some agencies offer Technical Sidemount courses to non-technical qualified divers. In those circumstances, the technical sidemount course acts as both intensive basic sidemount training and as an ‘intro-to-technical diving’ in sidemount. The courses do not qualify the diver to conduct technical, overhead or decompression diving; or otherwise, progress the student’s range of diving.
Level 3 – Advanced Overhead sidemount
Advanced Overhead level sidemount courses represent the highest level of sidemount training.
It is targeted at very experienced technical overhead divers who would choose to use sidemount configuration for more demanding and complex diving projects.
These courses are aimed to develop sidemount specific skill-sets for existing sidemount cave or technical wreck qualified divers. Training at this level deals with more advanced applications of sidemount, for instance; diving multiple stages on extended duration penetrations and techniques for passage through extreme restrictions as an individual or in a team.
Sponsored Link
Sidemount diving in caves and wrecks
Sidemount diving originated as a solution for cave divers, who needed a compact, streamlined configuration capable of allowing access through the smallest of restrictions underwater. When considering dives within an overhead environment, such as caves or wrecks, the ability to quickly and easily remove and replace cylinders on the go is extremely beneficial.
Sidemount also provides the benefit of allowing a ‘partial’ removal of primary cylinders to pass through moderate-severe restrictions.
This enables the diver to keep all their regulators in place and immediately accessible, but simply disconnect the lower cylinder attachment/s and swing the cylinders forwards to reduce their profile. Even with cylinders kept in place, the sidemount offers a lower height profile, which enables penetration divers to orientate themselves to fit more easily through narrow restrictions without having to remove any kit.
Not only does this permit passage into areas previously inaccessible to back-mounted divers, it increases the potential speed of movement through a passage. When diving emergencies happen in caves or wrecks, the speed of exit can be a life-saving factor. Sidemount configuration is ideally suited to penetration diving in the cave and wreck environments.
A well-designed sidemount rig will minimize the risk of entanglement, whilst also reducing the risk of entrapment in tight spaces. It provides access through smaller spaces, allowing greater exploration and discovery. It also helps prevent catastrophic impact damage to otherwise vulnerable (when back-mounted) regulators/valves, reducing the risk of lost gas.
Sponsored Link
Sponsored Link
What type of sidemount BCDs are available?
There are an increasing number of commercial ‘off-the-shelf’ sidemount systems available to purchase. These typically adhere to one of the two schools of sidemount BCD design heritage; the British (Mexico cave) or American (Florida cave) styles.
Learn more
Mexican-cave style sidemount systems
The Mexican-cave (aka English) style is generally a very minimalist design; which typically features a base webbing harness that uses lumbar and shoulder plates, to which a flat bladder is attached. They are typically very influenced by Hogarthian/DIR principles.
BCDs of this style are primarily popular in warm-water regions, where aluminium cylinders will be used. Their advantages are that they are very small, thus suitable for diving in confined spaces/tight penetrations and that they are very lightweight/low-bulk for travel. Attachment points for cylinders are typically D-rings on the waist belt. A good example of the British (Mexico cave) style of sidemount design is:
The Razor 2: The Razor was amongst the first commercially available Mexican-cave style sidemount BCDs.
It was designed by renowned cave explorer Steve Bogearts
The Razor was designed by renowned cave explorer Steve Bogearts as a refinement to the earlier low-profile sidemount rigs that were made using converted MSR hydration bladders.
It features a minimalist, modular bare-webbing harness, with D-ring attachment points, based around a lumbar/shoulder plate assembly. A flat ‘diamond’ shaped bladder then attaches to this harness.
The Razor 2 was the first of many similar BCDs to reach the market and inspired subsequent generations of sidemount BCDs; such as the UTD Z-Trim, XDeep Stealth and Apeks WSX-25 sidemount.
American (Florida cave) Style BCDs
American (Florida cave) style sidemount BCDs tend to have significantly more bulk, but offer a sufficient lift for use with multiple steel cylinders. The lower attachment points for cylinders are typical via a ‘butt pad’ with rails.
American-style sidemount BCDs are also more likely to offer integrated buoyancy redundancy.
They are generally designed around an integrated non-modular harness system. It is essentially a soft backplate, rather than a modular harness; so there is far less flexibility for individual sizing in spine length, or modification and customization.
A good example of the American (Florida cave) style of sidemount design is:
The Halcyon Contour Sidemount: The Halcyon Contour reflects a design heritage that arose from converting existing backmount BCDs for use with a sidemount. It has a modified doughnut wing that is integrated into an adjustable harness system.
The wing is retained at the rear by a soft plate that controls the distribution of gas in the bladder and prevents the wing from rising into a ‘taco’ shape. It has an integral butt-plate, with rails used as the lower attachment point for steel cylinders. The bulk and weight of this BCD far exceed that of the Razor 2, but it offers a very secure platform from which to mount numerous heavy steel cylinders.
Some sidemount BCDs are also designed to be ‘hybrid’; able to convert between sidemount and backmount roles.
They typically use a soft backplate that has grommets for attaching a single-tank adapter, backmount doubles or directly fitted with cam-bands. An example of a ‘hybrid’ backmount-sidemount BCD is the
Hollis SMS100. This BCD enables the diver to use single tank backmount, backmount doubles or sidemount with the same unit. It is available in dual/redundant-bladder design and has a very large lift capacity. It is, however, very bulky and heavy. Some manufacturers (for instance, Hollis and DiveRite) also offer sidemount BCDs with either a top or bottom (left) mounted low-pressure inflator hose.
The top-mounted hose may be more familiar to novice sidemount divers transitioning from conventional back-mount BCDs (thus marketed as ‘blue water’ or ‘open water’ design). The bottom-mounted LPI is typically popular with overhead environment divers, as it offers superior protection from abrasion/impact/entanglement; it is thus marketed as a ‘tec’ or ‘cave’ configuration. In many other cases, the LPI is interchangeable by the diver, between the top/bottom position (when there is a pull-dump located on the upper wing).
Sponsored Link
How to configure a sidemount diving system
The sidemount diving harness
The correct fit of the sidemount harness is critical to the stability and function of the rig. Harness designs tend to follow either a minimalist Hogarthian-inspired or adjustable (Comfort/Deluxe type) pattern.
Y-style | H-style
There are three types of sidemount harnesses:
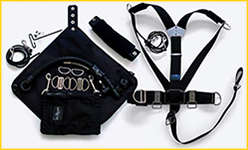
Soft Plate
Typically found on Florida-style systems
Similar to backmount soft backplates
Quick release webbing
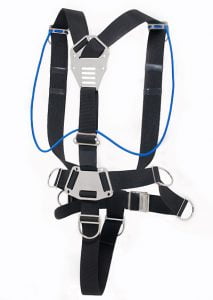
Y-Style Webbing
Typically found on Mexican-style systems
Uses shoulder and lumbar plates
One-piece webbing
H-Style Webbing
As per a Y-style, but shoulder straps go to the front waist
Beneficial for those who struggle to don a Y-style
For adjustable harnesses, the initial size selection is obviously very important; it can then only be tightened to fit snugly once worn.
In contrast, minimalist harnesses are ‘one-size-fits-all’ and infinitely adjustable to any user. Single-piece harnesses require more care and attention in the initial set-up, but once correctly sized, should fit like a glove. The single-piece harness needs to be sized and adjusted as one of the first steps in equipment set-up. As with preparing a back-mounted Hogarthian-style harness, it is well worth devoting some time to getting this right in the first instance.
Superior quality sidemount training courses will normally include a 1-day sidemount equipment workshop session to assist students in properly configuring and adjusting their sidemount BCDs prior to diving.
Whilst every diver will have a personal preference for harness style, it should be noted that DIR/Hogarthian-type minimalist webbing harnesses are generally regarded as being more streamlined, less inclined to entanglement and less likely to cause task loading/stress on the diver.
The principle of K.I.S.S. (Keep It Simple Stupid) is highly valued within the cave and technical wreck communities.
Aluminum cylinders are generally ubiquitous for warm water/tropical sidemount diving, as their buoyancy properties enable far better trim and streamlining of the cylinders next to the diver’s body. There is also less of a drastic buoyancy change should the cylinder be removed.
In cold water regions, where it is more normal to dive using very thick wetsuits or drysuits, the use of steel cylinders is far more common. In these instances, the weight of the cylinder is integral in countering the higher buoyancy potential of the exposure protection.
Basically, using steel cylinders helps remove lead from the weight belt. One benefit of steel cylinders is that they do not become positively buoyant as gas is consumed; meaning that the lower cylinder attachment does not need to be moved down onto the front waist-belt.
This is why cold-water sidemount BCDs generally use butt-plates with rails, whereas warm-water BCDs feature D-rings on the front and rear waist-belt for aluminum cylinders.
Sidemount cylinder buoyancy
Sidemount cylinders need to have balanced buoyancy characteristics if the effective trim is to be achieved. This obviously entails selecting matching (brand and capacity) cylinders.
However, the actual buoyancy performance of both cylinders should be assessed, as sometimes even matching brand/capacity cylinders can have mismatched buoyancy; for instance changes in the manufacturing process over time.
The size of selected cylinders is also important. Needless to say, the cylinders must supply sufficient gas for the dive/s to be conducted. However, many experienced sidemount divers will state that unnecessarily large cylinders should be avoided as they add bulk and reduce streamlining.
These factors can degrade the ability of the diver to penetrate restrictions and can also increase air consumption – thus eliminating the benefit of having more gas in the first place.
When selecting cylinders, it is wise to arrange some trial sessions, so that you can investigate how well a specific brand/model/capacity of cylinder operates in a sidemount configuration. Differences in length, design and thickness can have a notable impact on how well the cylinders hang from the diver.
Ideally, the cylinders should be equipped with left and right-sided valves, enabling a ‘mirror’ configuration on both cylinders – with the valve handle pointing outwards and the regulator upwards/inwards towards the diver.
Sidemount cylinder valves
The type of valves installed on cylinders can be very important in sidemount diving. This is especially true with respect to the bungee method used in the diver’s sidemount configuration.
Most sidemount divers prefer left/right-handed modular valves. This means that the valves on either side of the diver ‘mirror’ each other. Allowing the cylinders to be set up with the valve handles facing outwards on each side, with the regulator 1st stage facing upwards, or inside, of the diver.
Modular valves that have an extra protrusion of the valve ( the ‘stem’, where the isolator manifold would otherwise be screwed) assist with securing the bungee placement around the tank neck/valve.
Sponsored Link
Sidemount diving: regulators
Long hose and short hose
Most agencies teach sidemount regulator configuration in a pattern that reflects Hogarthian/back-mounted set-ups, particularly in respect of including a long (5’-7’) hose for air-sharing in overhead environments and through restrictions. Some sidemount courses don’t demand this at Level 1 training, but all do at Level 2 and above.
A suggestion for regulator configuration might be:
Left-side regulator
SPG on a 6” hose
LPI hose, sized to fit the particular sidemount design (upper or lower mounted inflator)
Short-hose regulator with necklace bungee (24-36” hose)
Right-side regulator
SPG on a 6” HP hose
LPI hose (if using redundant bladder design) or dry-suit hose.
Long-hose regulator (5’-7’), with bolt-snap for securing.
The use of a right-angle adaptor may be considered on the left-side regulator, or both, of hose-routing, which creates a pull on the regulator and strains the diver’s jaw.
Read more about the three different sidemount hose configurations:
For sidemount diving, it is beneficial to use a break away connector for the long hose bolt snap. This is because the bolt snap could jam and prevent regulator donation to an out-of-gas diver. Backmount technical divers use “cutaway” connections for the long hose bolt snaps because they are not clipping off their long hose regulators throughout their dives. A cutaway connection is too slow for time-critical gas donation. A sidemount break away connector can simply be snapped to free the long hose; enabling reliable and fast regulator donation. Read more in this article:
The choice of regulator brand should reflect some consideration of hose routing requirements; with sufficient and well-located ports to enable a clean, streamlined configuration. Hoses should route close to the diver’s body, without protrusion beyond the diver’s outline. In general, a regulator design that is preferable for back-mounted doubles will also be suitable for side-mounting.
A-Clamp type regulators should definitely be avoided, as the protruding handles present an entanglement risk, whilst any impact can more easily dislodge the regulator and cause o-ring failure. They also don’t fit well under the armpits – and can prove uncomfortable for the diver.
The short-hose regulator (left side) runs behind the diver’s neck from the left and is located in the bungee necklace worn around the diver’s neck.
The long-hose regulator (right side) routes similarly to back-mounted doubles in a ‘hogathian loop’; across the torso and around the diver’s neck anti-clockwise from the left. Any surplus long-hose length is retained by rubber loops against the left-side cylinder.
Hoses types for sidemount diving
Miflex/Nylon-braided hoses may be considered for the short-hose regulator and LPI hose/s. However, there have been some worrying reports of failures with these types of hoses. Some instructors don’t recommend them as a consequence.
Many technical divers are disinclined to use nylon-braided long hoses, as they are less negatively buoyant (“floaty”) and have less friction – making them harder to ‘hog loop’.
In addition, some divers note that they are more inclined to be abrasive against the back of their neck. Miflex HP (SPG) hoses have encountered reliability issues and are not recommended at this time.
SPGs for sidemount diving
Both cylinders/regulators are fitted with SPGs. The use of a 6-9” HP hose (not tied back on the reg) enables the diver to manipulate the gauges for reading, whilst maintaining a streamlined configuration with less risk of snagging.
The most common method to orientate SPGs is to route them directly down along the tank.
This keeps the hoses most streamlined and significantly reduces entanglement hazards.
Sidemount divers must then learn how to locate and read the SPGs when diving. That’s quite simple once a little ‘muscle memory’ has been ingrained.
An alternative approach is to orientate the SPGs vertically from the top of the 1st stage. This is often referred to as ‘Lollipop SPGs’.
These are easier to secure and read, but have the disadvantage of risking greater entanglement hazards. To help counter that hazard, some overhead environment sidemount divers subsequently place loops of bungee onto their shoulder harnesses to restrain the lollipop SPGs.
That, however, just adds further complexity to the setup.
Sidemount diving: hose retainers
Both cylinders should feature a number of hose loops to retain hoses whenever they are not in use. The general options for hose restraining loops are:
Rubber Loops: 1” wide, cut from a car inner tube.
Pro: Cheap, easy to make
Con: Difficult to replace hoses in-water
Elastic Loops: Typically sold specifically for sidemount cylinders by kit manufacturers.
Pro: Work well until elasticity fades
Con: Expensive
Bungee Loops: 6mm bungee tied with an overhand knot.
Pro: Cheap and easy to make
Con: Can pop off the cylinder when removing the hose.
Generally, the left-side cylinder only needs 1-2 loops because the hose will be fully deployed and worn throughout the dive.
The primary reason for a loop on the left side is only to keep the regulator secure during pre/post-dive transit.
The right-side cylinder needs 2-3 loops.
These are more important because they secure the extra length of the long hose throughout the dive. The type of loop used is more important on the right side, as the diver will need to swiftly re-stow the extra hose length after each time it has been deployed.
Sponsored Link
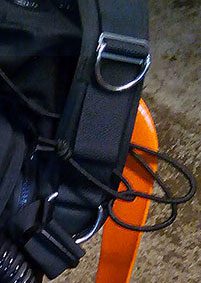
Sidemount diving: bungees
Most commercially available sidemount diving systems are provided with an appropriate bungee system to secure and streamline the trim of the upper cylinder attachment.
However, regardless of what manufacturers might supply, the sidemount diver may have their own personal preferences on which method of bungee best suits their needs. There are several primary options.
Some manufacturers supply pre-sized (cut and sealed) bungees which are entirely incompatible with the necessity for sidemount divers to individually size their bungees for the sake of proper cylinder trim.
A bad example
Sidemount bungees cannot be used ‘off-the-shelf’ if proper ‘along the torso’ cylinder trim is desired. It SHOULD be desired.
The bungees should hold the regulator’s 1st stages just underneath the divers’ armpits. If the regulators/valves drop below the diver, then the tail of the tank will pivot and rise. The cylinders will be out of trim.
Likewise, the valve/regulators should not protrude forwards of the armpits, where they cause the diver to dive like a ‘gorilla’ with their arms out and around the tanks. This not only reduces the diver’s ability to physically access equipment and attachments alongside their torso, but it also deters good cylinder trim and streamlining.
The thickness and elasticity of the bungees is also important component in proper cylinder configuration.
Optimal cylinder trim
The bungees must be strong enough to support the weight of the specific cylinders used, but should also not be over-strong; so that they present the diver with physical problems manipulating the bungee on/off the cylinder valve. In general, a 6mm bungee is sufficient for most aluminium cylinders.
For heavier steel cylinders, an 8mm bungee may be needed. Bungees thicker than 8mm are overkill and will cause great frustration. Some manufacturers supply bungees up to 12mm thick. Be warned!
There are several main approaches to bungee configuration:
Sidemount diving: Continuous bungee
This is a single piece of bungee that routes around the diver’s back. It is secured at the front shoulder D-rings by two bolt snaps. The main advantage is that this method can easily be removed/replaced in water. It is a popular choice as a ‘backup’ bungee for emergencies (if your primary bungee breaks). This is supplied with the Razor sidemount system. If looped around the cylinder neck, it does not require left/right-handed valves or cylinder valves with extended stems.
Continuous Bungee
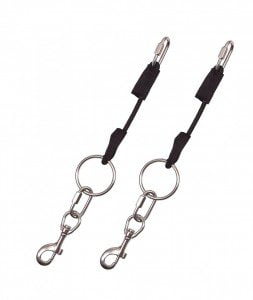
Sidemount diving: Individual bungee
These are two separate bungee lengths that are attached (tied) to the rear harness and at the front shoulder D-rings by two bolt snaps.
Unlike the continuous bungee, if one side were to fail, or the cylinder dropped out, then the other cylinder would be unaffected.
This comes with Hollis sidemount BCDs. If looped around the cylinder neck, it does not require left/right-handed valves or cylinder valves with extended stems.
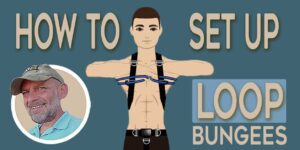
Sidemount diving: Loop bungee
Loop bungees are secured on both ends at the rear and run through an attachment on the shoulder harness in the front. The most common front attachment is a fixed-in-position weight retainer/tri-glide with a smaller loop of bungee through it.
The primary loop of the bungee is free-sliding through the restraining loop on the harness. The loop bungee method requires left/right-handed valves and/or valves with stem extensions, as the bungee needs a secure point to be hooked around.
Identical in every way to the loop bungee method, but uses a sliding (or floating) loop around the shoulder harness to connect the front of the primary bungee loop.
This adds greater freedom of movement for the cylinders and promotes better cylinder positioning on the torso.
The securing harness loops can be made from bungee or thick industrial-sized o-rings. Loop and Sliding Loop Bungee are options with XDeep, Apeks and UTD sidemount BCDs.
Sliding / Floating Loop Bungee
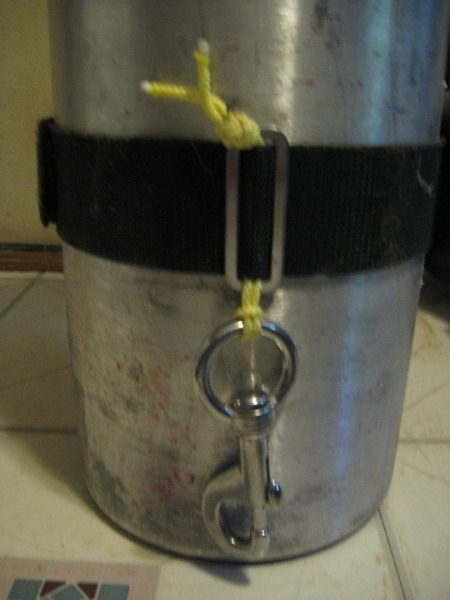
Sidemount diving: Ring bungee
The ring bungee method involves putting a metal ring onto the bungee to which the cylinder is clipped using a bolt snap attached (via restraining choker)at the cylinder neck.
This allows very easy removal/replacement of the cylinder from the BCD. It can work with steel cylinders but does not deal well with the buoyancy changes inherent in aluminium cylinders. DiveRite supplies Ring Bungees with most of their sidemount BCDs.
Ring bungees
All of the bungee methods have pros and cons – but remember that the ultimate goal is always to promote proper trim of the cylinder, with the valve/regulator nearly up behind the armpit and the cylinder kept in trim along the torso (not rising above, or dropping below, the diver).
Sponsored Link
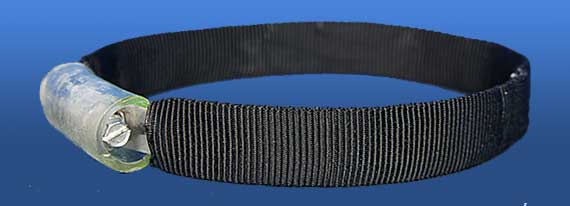
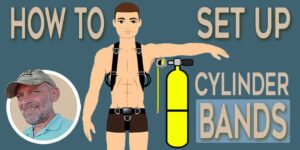
Sidemount diving: cylinder bands
The lower cylinder attaches to the harness through a bolt snap that is secured on the cylinder with a band.
Sidemount divers either use a cam band, such as is supplied with regular BCDs, or a metal worm-screw band.
Cam bands for sidemount diving
Cam bands are significantly bulkier and heavier. However, they do allow easy in-water adjustment and cylinders can be changed between dives without requiring tools.
Cam-bands for lower cylinder attachment
Worm screw bands for sidemount diving
Metal worm-screw bands are much lighter, less bulky and less prone to entrapment/entanglement; but you need to carry a screwdriver or dive tool to move them from one tank to another. With practice, neither option is faster or slower than the other. The bolt snap is secured to the cylinder band through a short length of nylon cord.
Worm-screw cylinder band
The easiest method for this is to tie the cord into a loop (simple overhead knot) and around the tail of the bolt snap. The knotted end is then trapped/secured under the cylinder band. A nylon cord is used so that it could be cut away if the cylinder became trapped, or the bolt-snap jammed closed.
The choice of bolt-snap, along with the length of the nylon cord, is determined by 2 factors; firstly, the diver needs to physically manipulate the snap…and with thick gloves, a bigger-sized bolt-snap might be needed. Secondly, the combined length of the bolt-snap and nylon cord determines the range of motion of the lower cylinder. This is important in keeping the cylinders in trim with the torso.
Positioning the cylinder bands
The positioning of the cylinder band/bolt-snap plays a direct role in the trim of the sidemount cylinders. Lowering or raising the position of the band will have two effects; it will pull the cylinder up or down alongside the diver’s torso (allowing correct positioning of the valves under the armpits) and it can help control the tendency of aluminium cylinders to float ‘butt-high’ above the diver as gas is consumed.
The ideal positioning of bands on the cylinder will be determined by factors such as the diver’s height and the design of the sidemount harness worn. Spending some time in shallow water, with near-empty tanks, will allow the diver to ascertain an optimum position for their cylinder bands.
As a general rule of thumb, the cylinder band should be located at the same height as the lower attachment point on the diver’s harness. If the valves/regulators are to stay in the armpit area, then you simply have to measure the distance from the armpit down to the attachment point on your harness. Then measure that same distance down from the valve top on your cylinder. This is where your bands should be positioned.
On British (Mexico cave) style harnesses, or where you can otherwise decide/adjust/modify your configuration, most sidemount divers will recommend low-profile D-Rings for cylinder/bungee attachment. Not only do these reduce the risk of snagging, but also hold the cylinder more tightly and securely against the body – increasing stability and aiding trim management.
In very cold-water conditions, where heavy gloves reduce dexterity, a diver might opt for bigger D-rings (to match bigger bolt snaps), but that remains detrimental to ideal cylinder trim
Some sidemount divers opt to fit sliding D-rings, or an extra pair of D-Rings, on the waist belt of the harness – as this permits aluminium cylinders to be progressively lowered during the dive, allowing the maintenance of correct cylinder trim as the tanks become more buoyant. This is not strictly necessary, as aluminium cylinders tend to be either buoyant or negative – so fixed D-rings are more than sufficient to keep cylinders perfectly in trim.
Sponsored Link
Gas management for sidemount diving
Unless utilising a manifold system (i.e. the UTD ‘Z-Manifold), the sidemount diver is operating two independent tanks during their dive. This requires consideration in gas management in order to maintain the balance between the cylinder buoyancy during the dive and also, most importantly, to ensure that sufficient gas is reserved in each cylinder to permit an air-sharing exit/ascent from the dive.
Rule of Thirds and Reserves
Most technical and overhead-environment divers will maintain the ‘rule of thirds’ as the least conservative option when diving sidemount. Recreational divers can retain a simple reserve; sufficient to get themselves and a buddy to the surface from their planned depth. This can be a fixed reserve (i.e. 50 bar/500psi per tank) or a calculated reserve such as Rock Bottom gas management.
When diving in an overhead environment, or with a decompression obligation; it is essential that both cylinders maintain an independent reserve of, at least, 1/3 capacity. It is not sufficient to drain one cylinder, retaining all of your reserves in the other, as this does not provide an air-sharing capability to support your team.
Balancing Cylinders – Regulator Switching
To maintain balance (approximately matched buoyancy characteristics) between cylinders, there is a requirement for switching regulators during the dive. This ensures that your planned reserve is held in both cylinders and also keeps cylinders balanced (weight of gas) on either side of your body.
Regulator Swapping frequency
Most sidemount divers choose to swap regulators/cylinders at pre-designated intervals. This is typically every 20-30bar / 300-500psi.
Regulator Swapping 1/6ths
One method of maintaining cylinder balance is to swap regulators for every 1/6th cylinder of gas consumption. This would mean each regulator was breathed from twice, before reaching the gas turn-point (2/3rd) and a further two switches on each regulator until the reserve (1/3rd) was reached.
Regulator Swapping 1/3rds
An alternative method (simpler, but less refined cylinder balancing) would be to switch regulators with every 1/3rd of gas consumed (on each cylinder). This would mean each regulator was used once, before reaching the gas turn-point (2/3rd) and once more, per regulator, before reaching the reserve level (1/3rd).
Breathe to reserve, then switch
It is not safe to breathe from a single cylinder until the turn-point and then switch. This would leave insufficient gas remaining in that cylinder for an air-sharing exit/ascent. The diver would only have 1/3rd of a cylinder, not 1/3rd total supply for that exit.
Benefits of frequent regulator switches
Regular regulator switching also helps ensure that neither regulator becomes unworkable – an especially prudent measure when sidemount diving through restrictions in high silt/mud conditions.
Sponsored Link
Using stage/deco cylinders for sidemount
For technical/decompression diving, there are numerous options for stage/deco cylinder stowage. Cylinders are typically configured in the ‘standard’ manner, with bolt-clips/band at the bottom and a loop around the cylinder neck with another bolt clip. The primary decision for a technical sidemount diver is whether to store the stage cylinders above, or below, the sidemounted primary cylinders.
Sidemount diving: stage/deco below
Securing them below the primary sidemount diving cylinders, in a traditional manner attached to waist/butt D-rings and chest harness D-rings, provides easier access for removal, should they be staged along the way, but causes them to hang lower below the body. Some sidemount divers seek to rectify this by adding further bungee options to tighten the tank valve into their bodies.
Sidemount diving: stage/deco above
The alternative method is to stow the stage/deco cylinders above the primary sidemounts. This has distinct advantages in respect of cylinder trim and overall streamlining, although it can pose further complications in attachment, depending on the harness system used.
Sorenson/Hires – Bungee staging
One solution for upper-stage bottle attachment was popularized by Edd Sorenson and Lamar Hires. This involves rigging the bottom clip higher than usual (for a stage tank) and using a further loop of bungee cord around the tank neck to connect the top bolt snap. The additional flexibility offered by the bungee permits easier attachment/ disengagement of the stage, whilst keeping it more snugly against the diver’s torso. The raised position of the bottom clip serves to pull the stage cylinder lower on the diver, below the armpits. The added advantage of mounting stages about primary sidemounts is that the (full) stages will rest upon the sidemounts, helping to prevent them from rising as air is consumed.
Sponsored Link
What are the sidemount diving skills?
The following represents a summary of the critical skills taught by a spectrum of agencies at various sidemount diving levels. Please note that this is a very generalized list, covering the sidemount diving syllabus of multiple agencies – there are differences between agencies:
Recreational sidemount courses
Equipment Configuration and Assembly
Pre-Dive Safety Checks
Attaching tanks on land and at the surface (shallow and deep water)
Andy Davis is a RAID, PADI TecRec, ANDI, BSAC, and SSI-qualified independent technical diving instructor who specializes in teaching sidemount, trimix, and advanced wreck diving courses.
Currently residing in Subic Bay, Philippines; he has amassed more than 10,000 open-circuit and CCR dives over three decades of challenging diving across the globe.
Andy has published numerous diving magazine articles and designed advanced certification courses for several dive training agencies, He regularly tests and reviews new dive gear for scuba equipment manufacturers. Andy is currently writing a series of advanced diving books and creating a range of tech diving clothing and accessories.
Prior to becoming a professional technical diving educator in 2006, Andy was a commissioned officer in the Royal Air Force and has served in Iraq, Afghanistan, Belize, and Cyprus.
Sidemount Diving | Book Release | Rob Neto Sidemount Diving - The Almost Comprehensive Guide book release by author Rob Neto Rob Neto, the highly regarded sidemount and cave instructor is releasing his…
Is Sidemount …? A comprehensive FAQ Guide Answering the most common sidemount questions. Is sidemount...? What sidemount...? How sidemount...? A growing resource for quick answers.
Ultimate Guide to Sidemount Cylinder Trim Sidemount cylinder trim is a headache for many sidemount divers. This illustrated guide will help you diagnose the problem & find the solution
The History of Sidemount Diving A complete guide to the history of sidemount diving: how it evolved and the principles that were shaped from differing environmental needs.
Is Sidemount Diving Technical Diving? Sidemount diving has soared in popularity since 2012, but some still debate whether it is technical level diving or exclusively suitable for only specific diving…